3.9 KiB
Keycloak Setup
This guide explains how to configure the backend service to work with Keycloak. Throughout these instructions, we assume you are already logged in with the admin account.
Activate Authentication
Before using the API service, you must enable authentication and set the client ID so the backend can perform operations on Keycloak, such as registering users.
-
Open the Keycloak service at http://localhost:9083/.
-
Once the page loads, ensure you are in the correct realm. The realm name is specified in the
.envfile: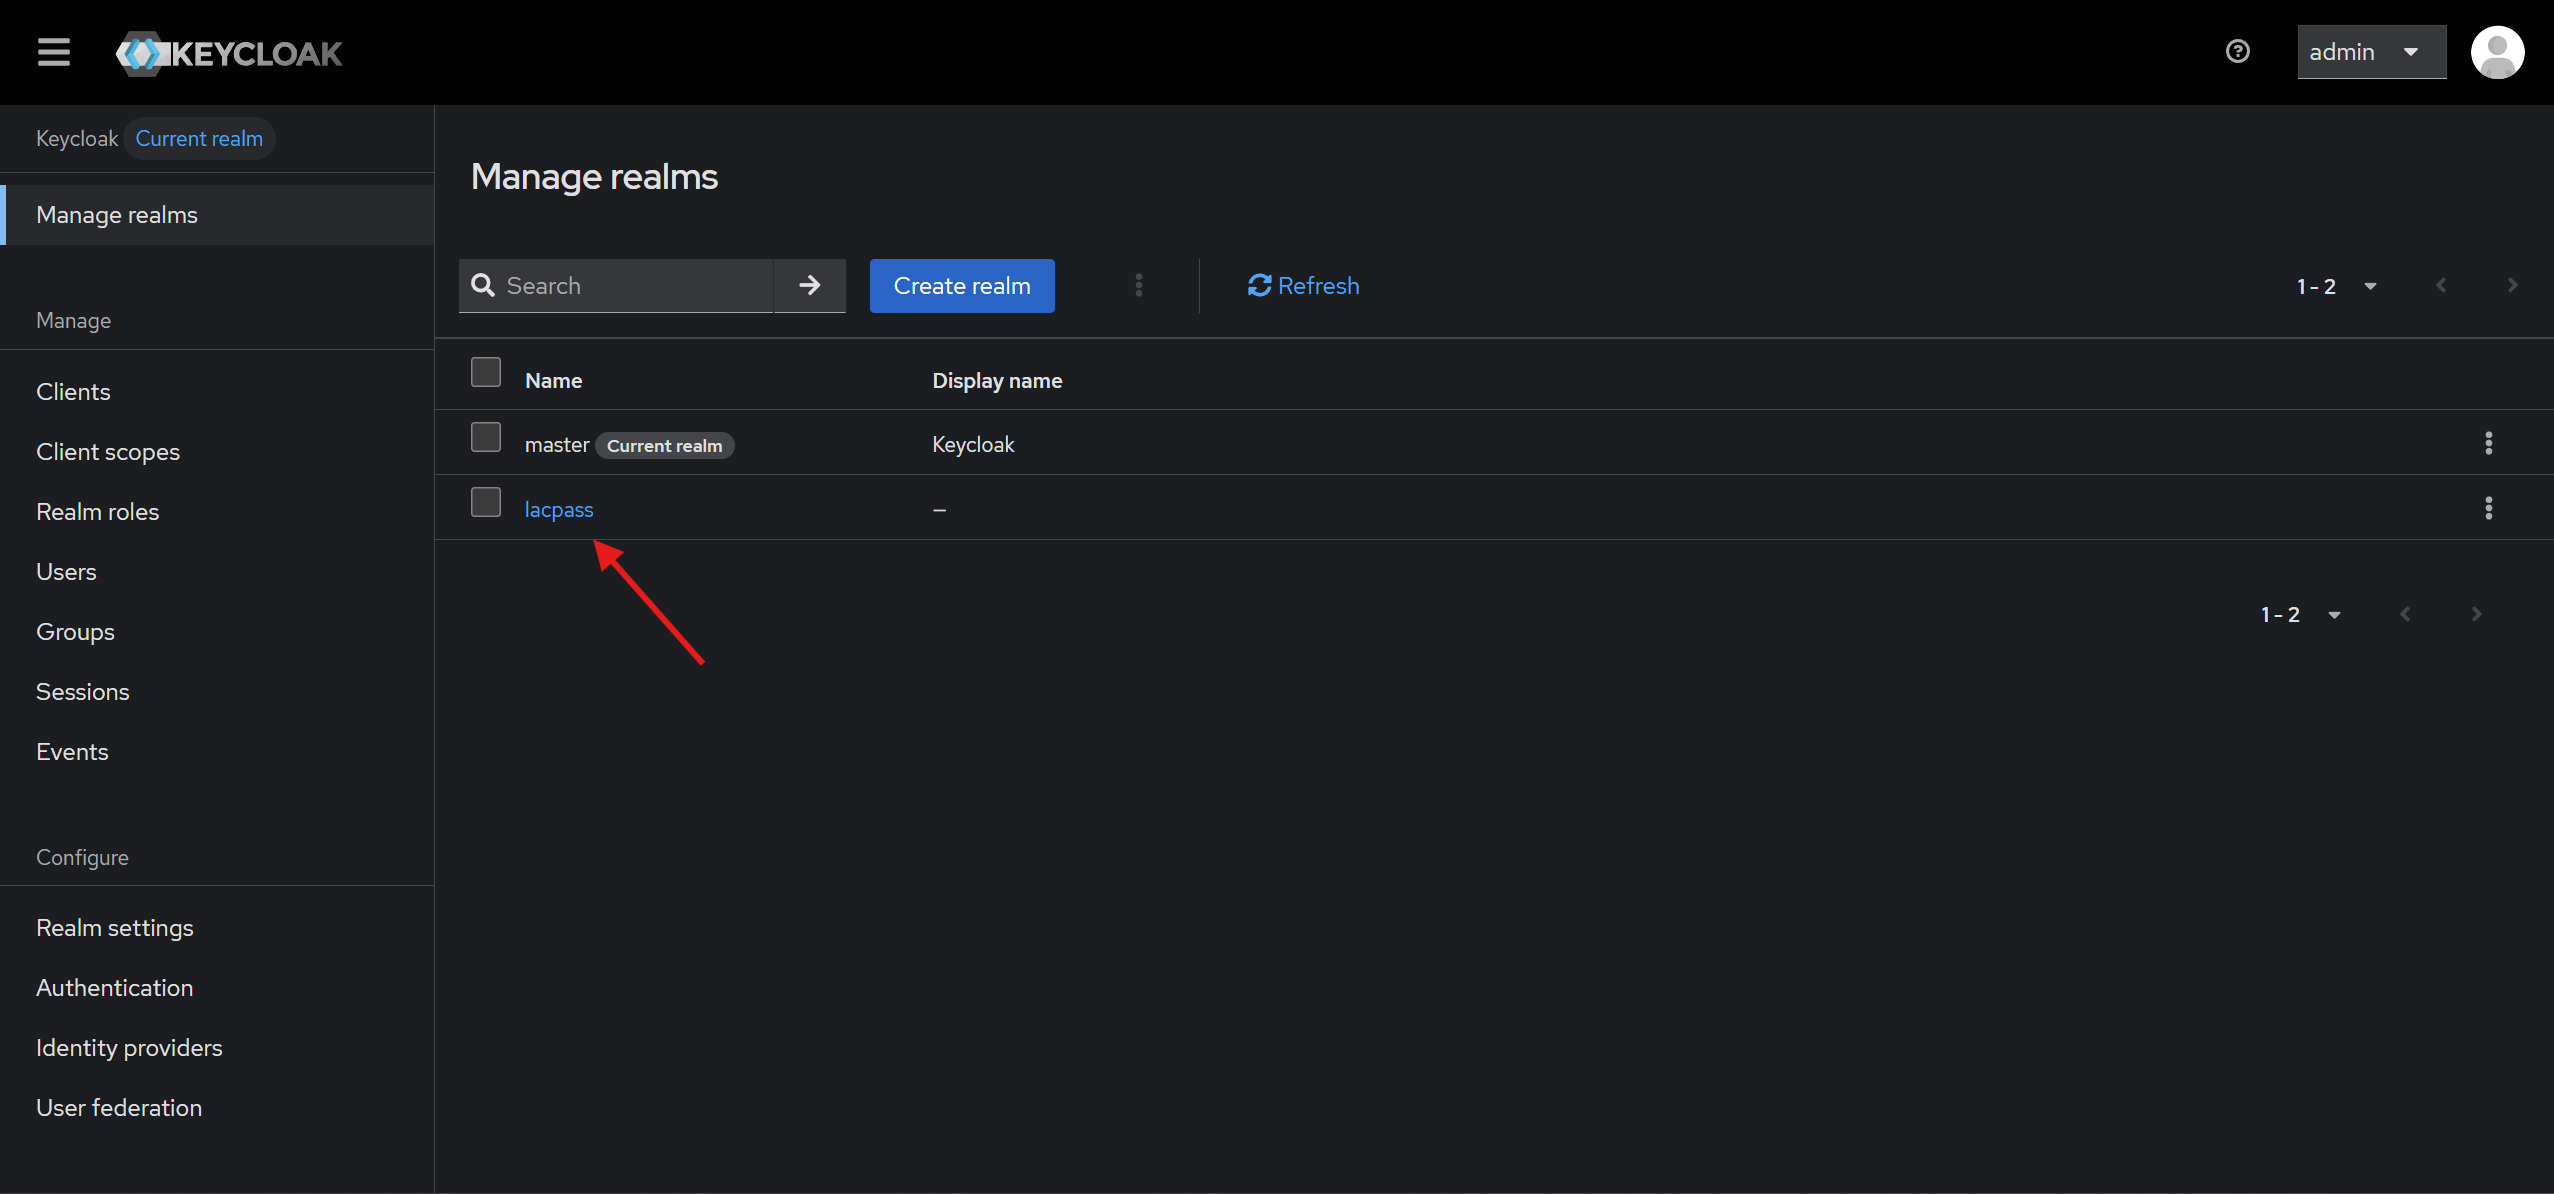
-
To enable authentication:
-
Go to the
admin-cliconfiguration: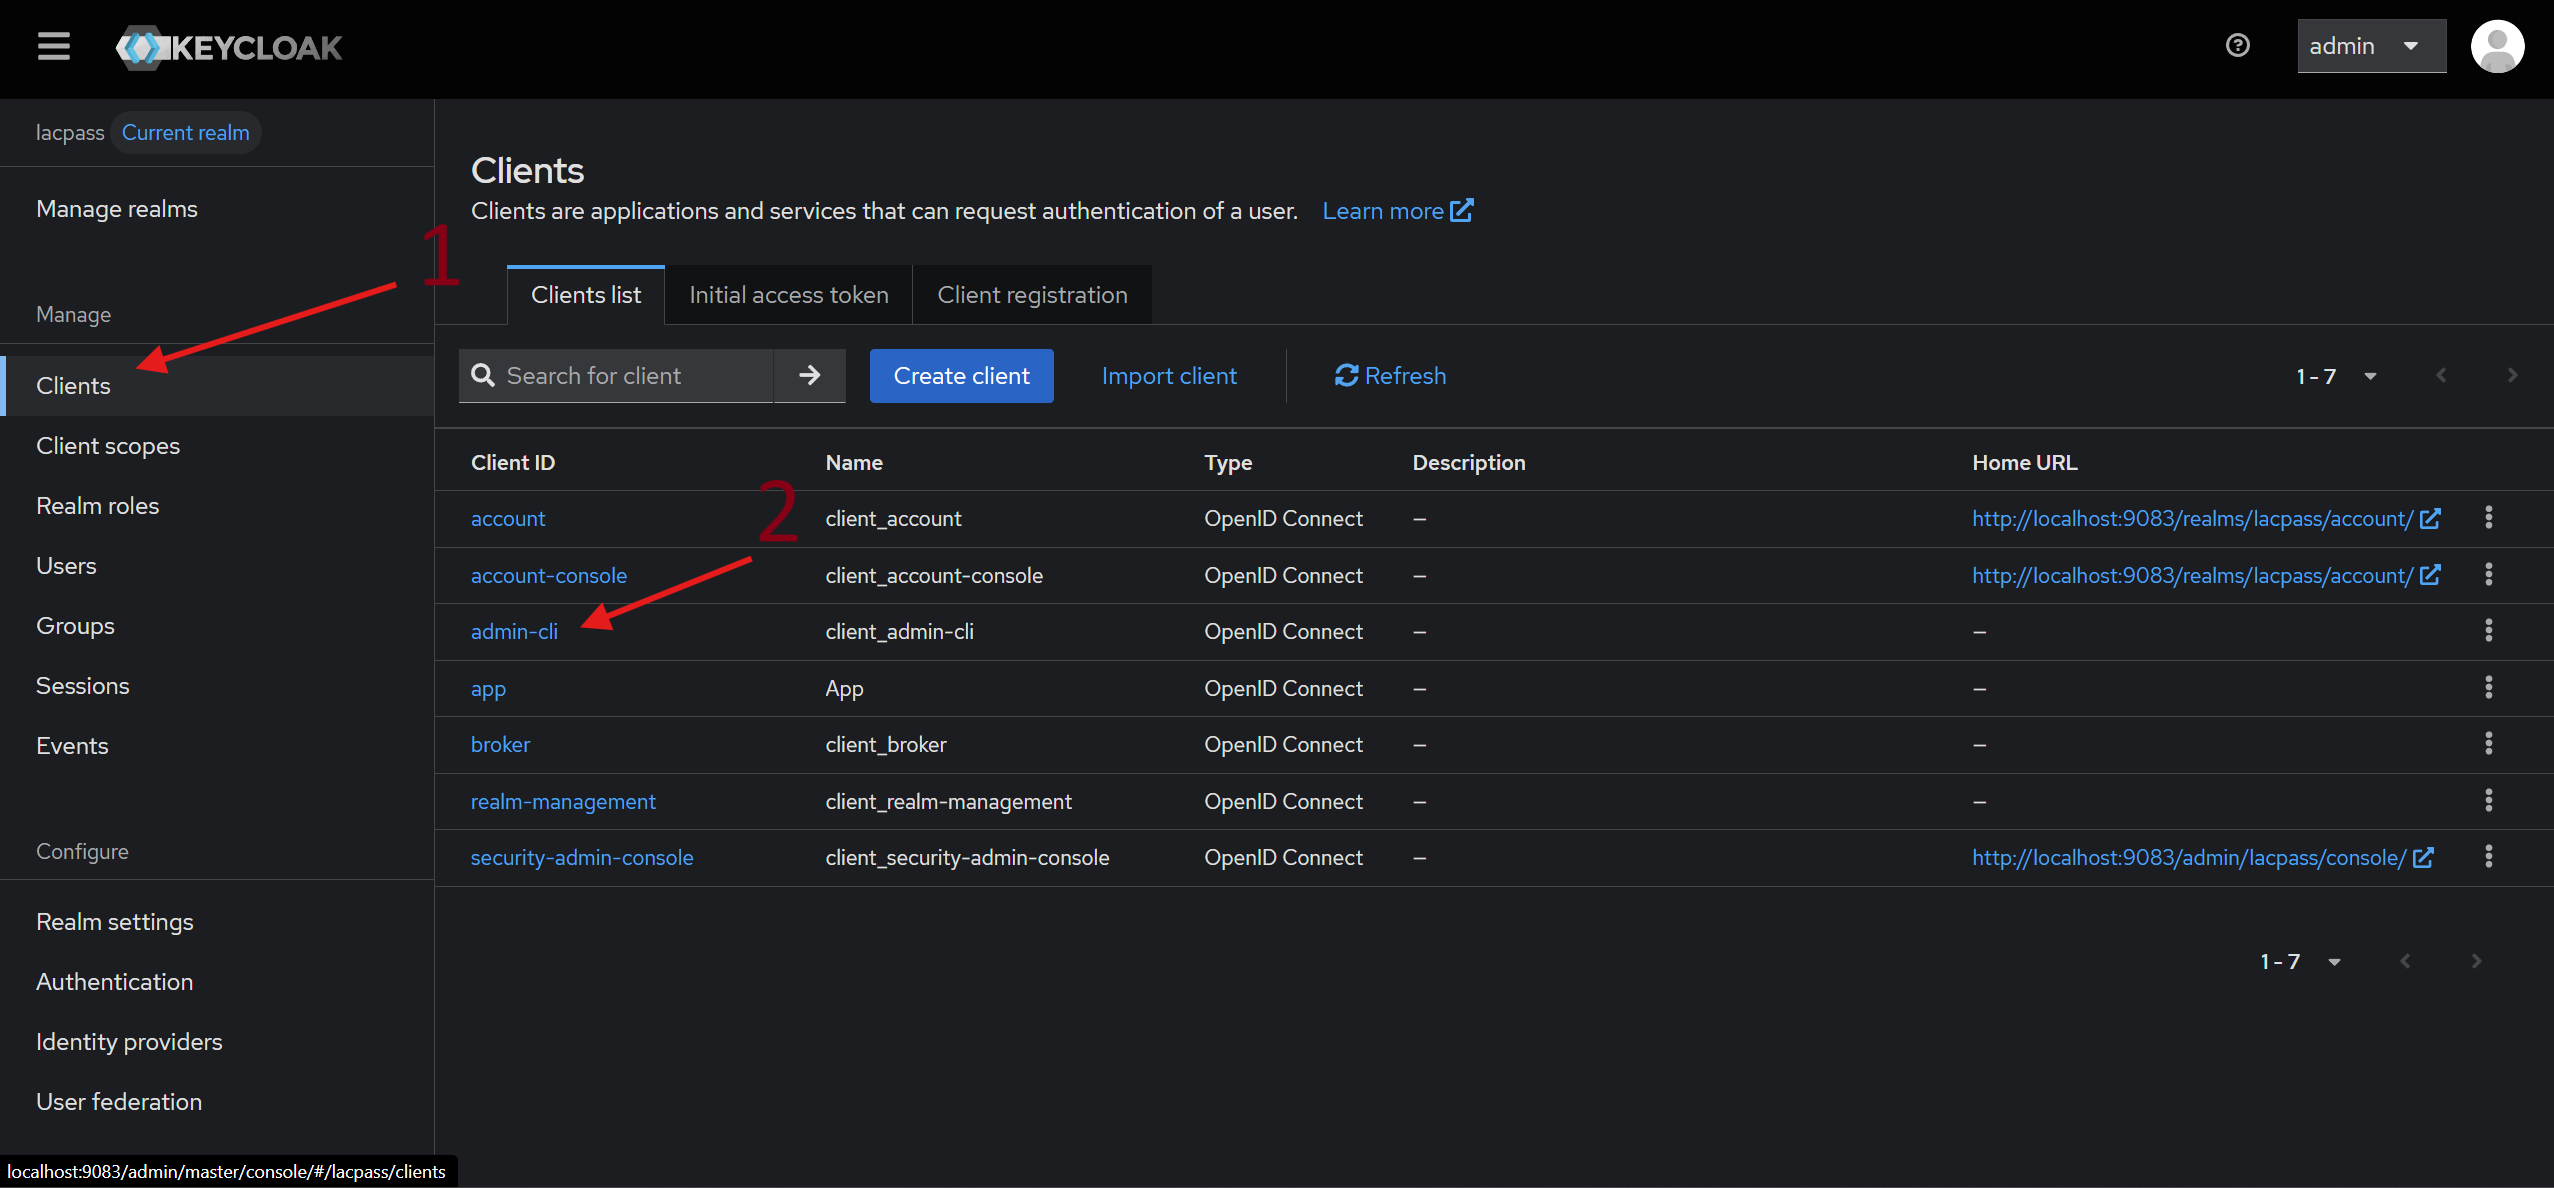
-
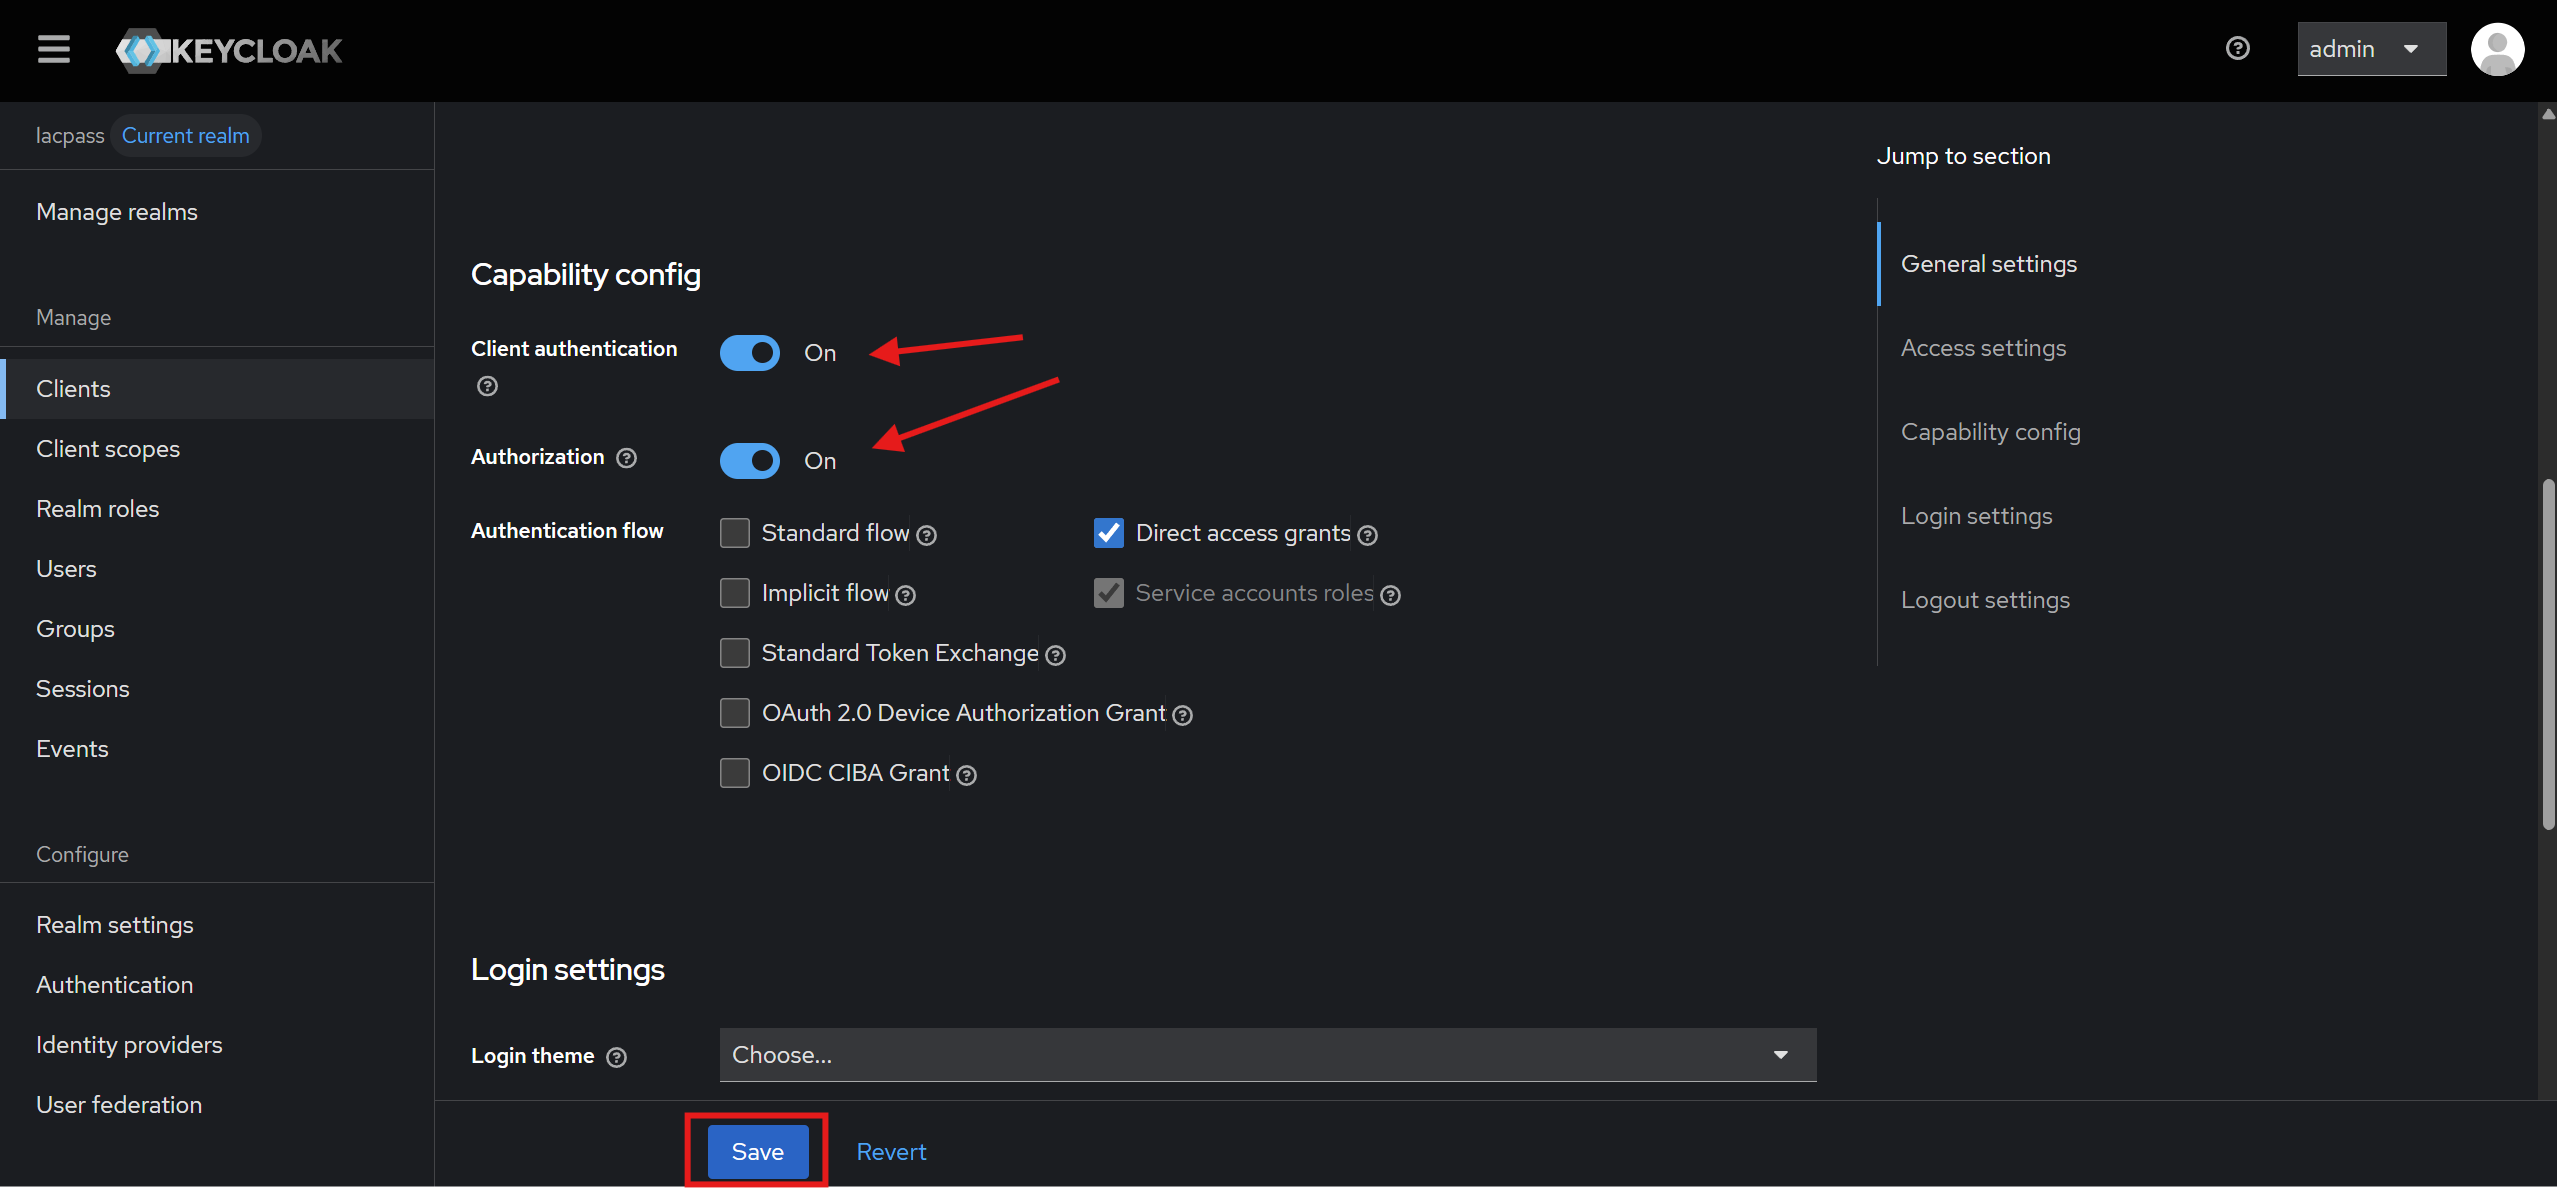
Scroll down to the Capability Config section and enable the two switches as shown below:
-
Click Save to apply the changes.
-
-
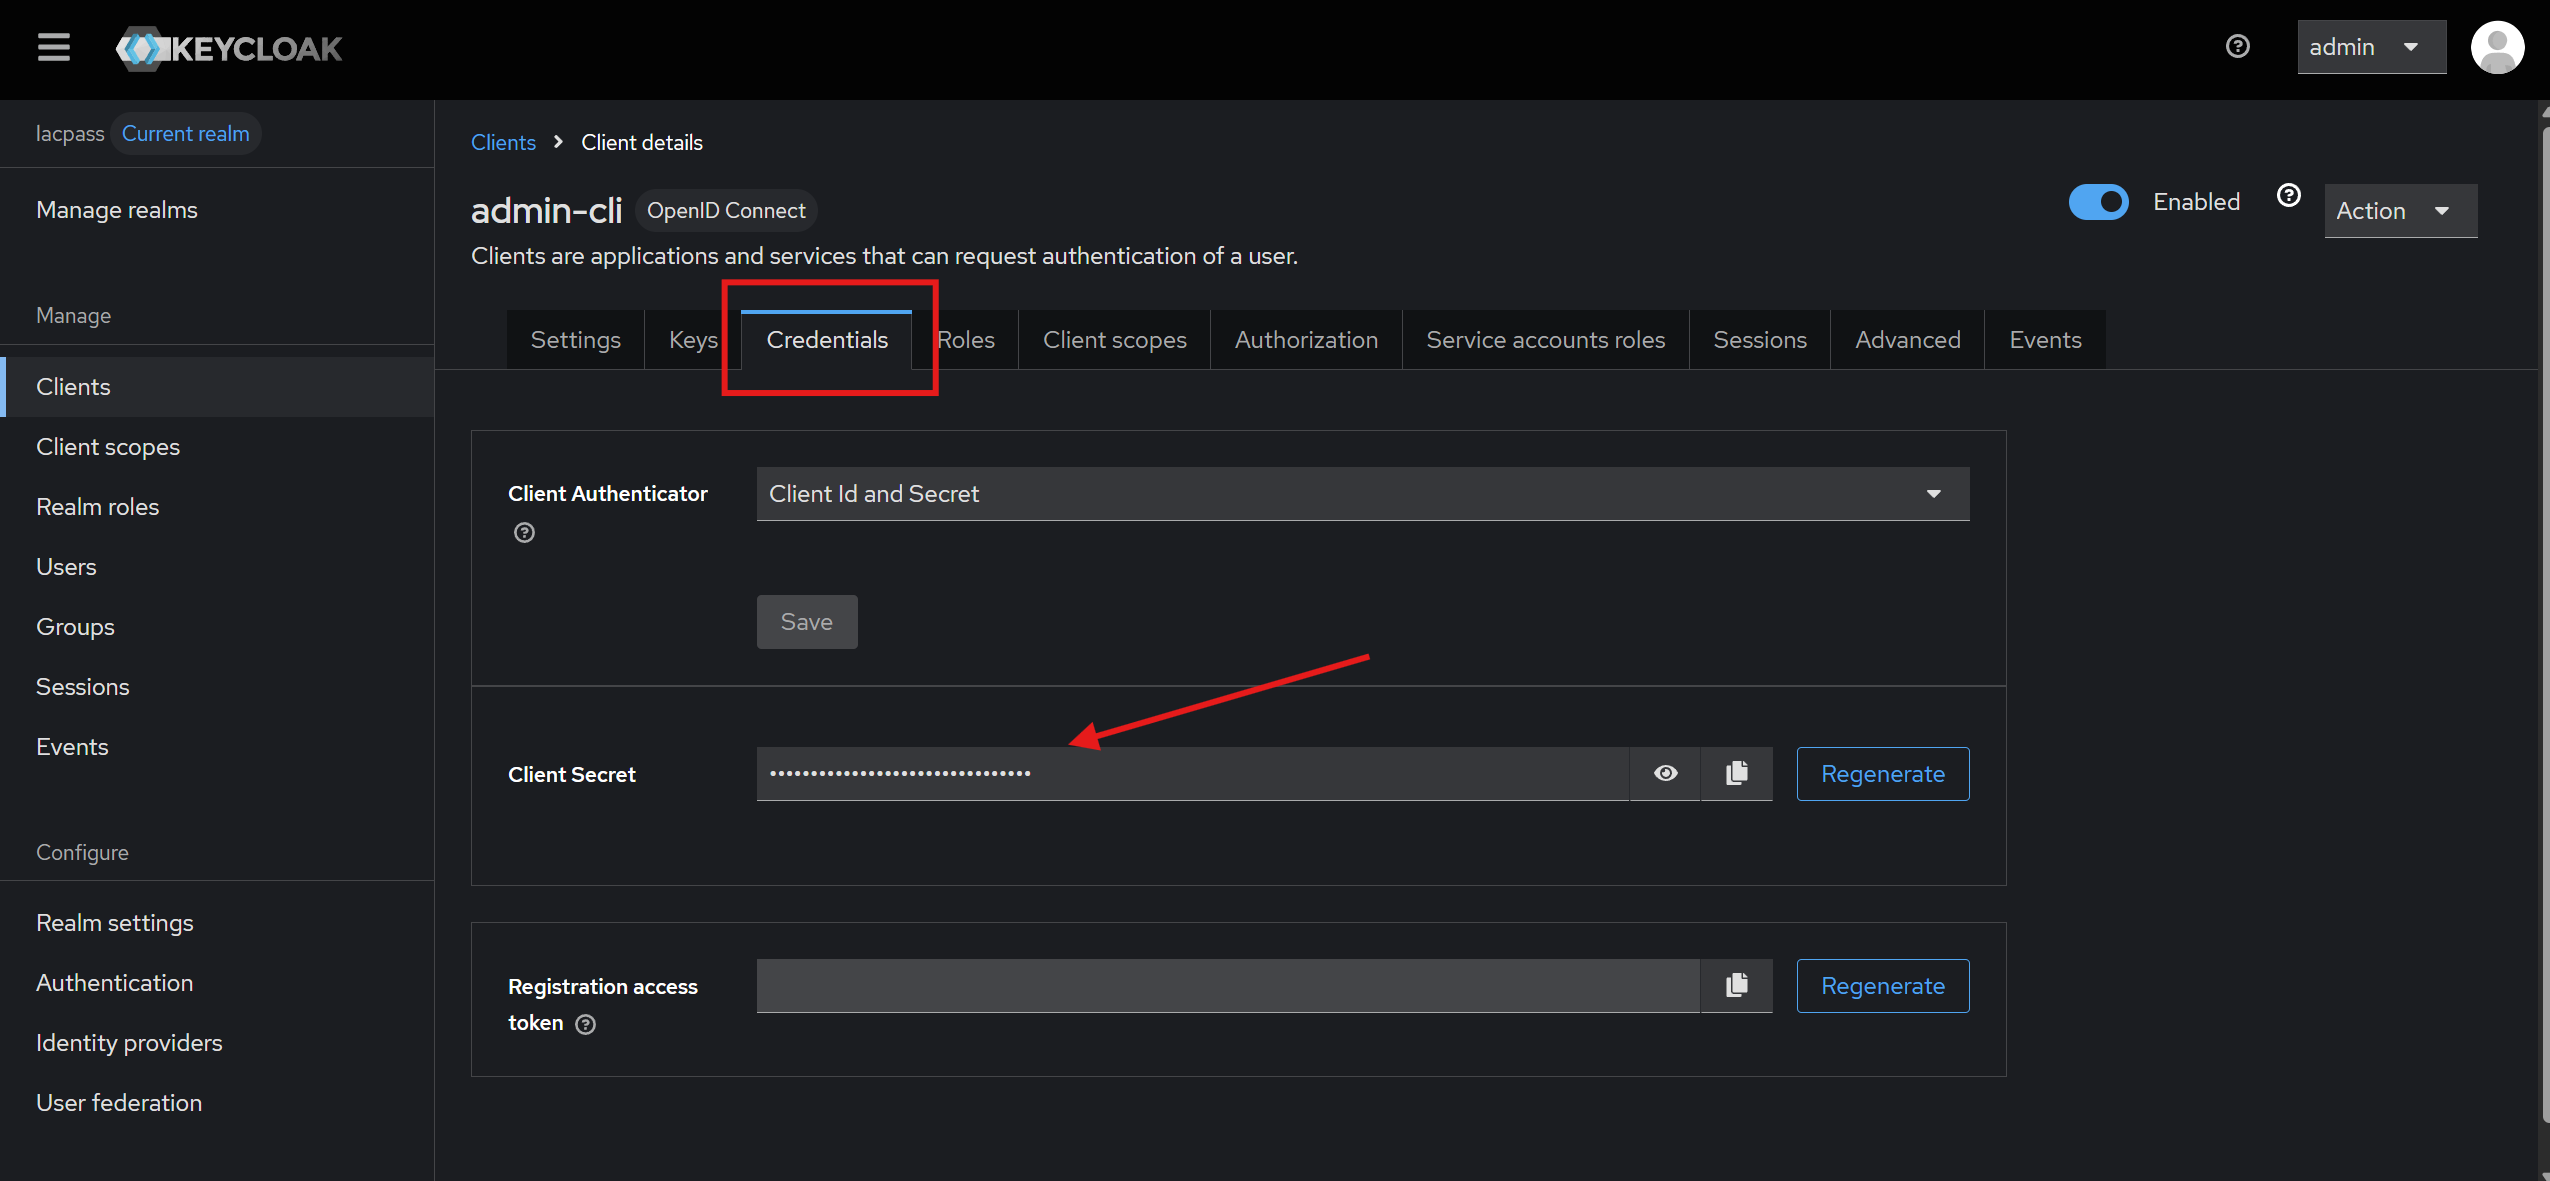
To retrieve the client credentials:
-
Navigate to the Credentials tab.
-
Copy the client secret value (it may be hidden by default).
-
This client secret is required in the Docker Compose file to configure the backend service. Add it to the appropriate section:

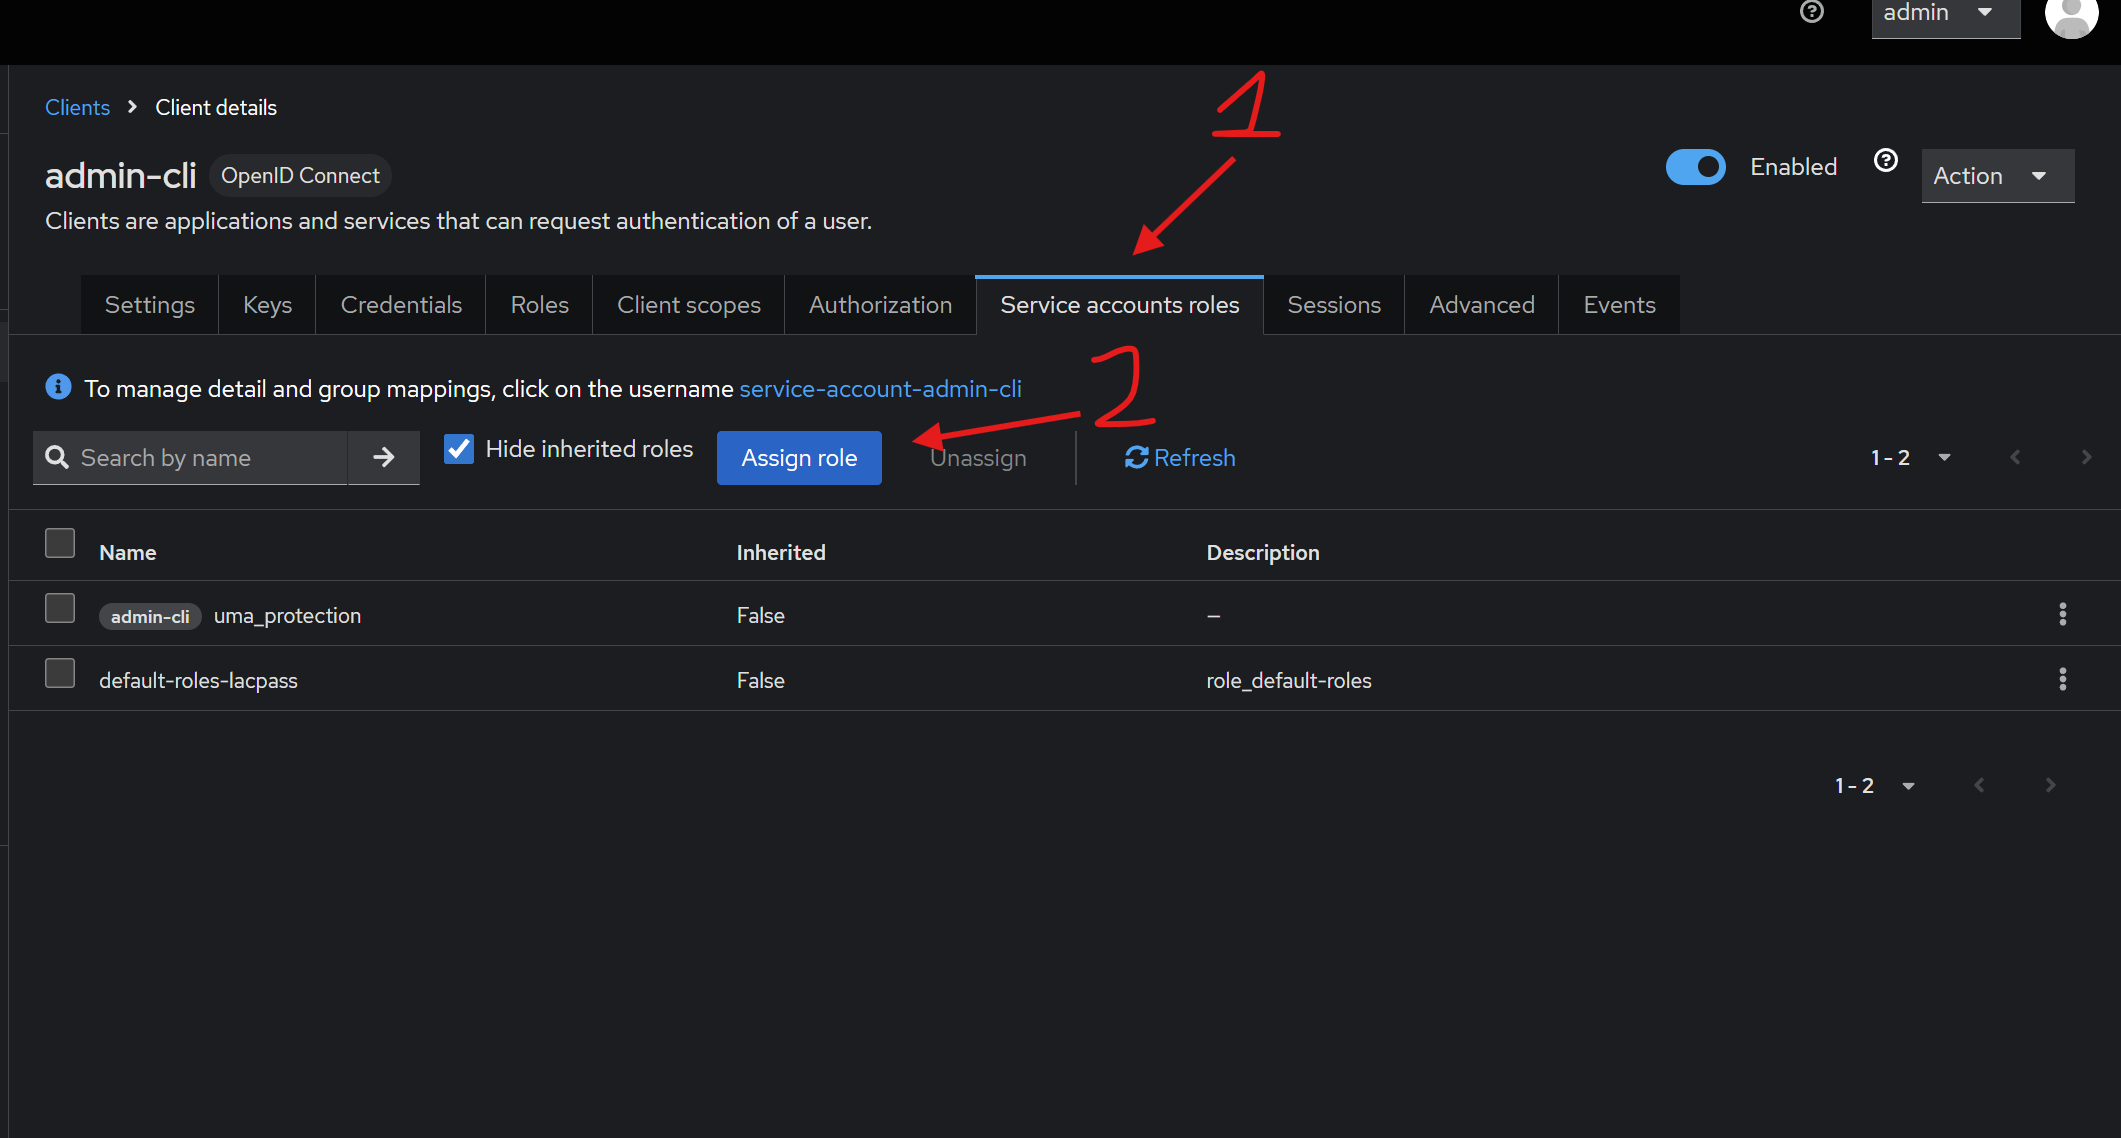
Set Roles for Backend Interaction
To allow the backend service to perform all necessary operations, the admin role must have all service account roles assigned.
-
Go to the Service Account Roles tab.
-
Click Apply Roles to assign roles.
-
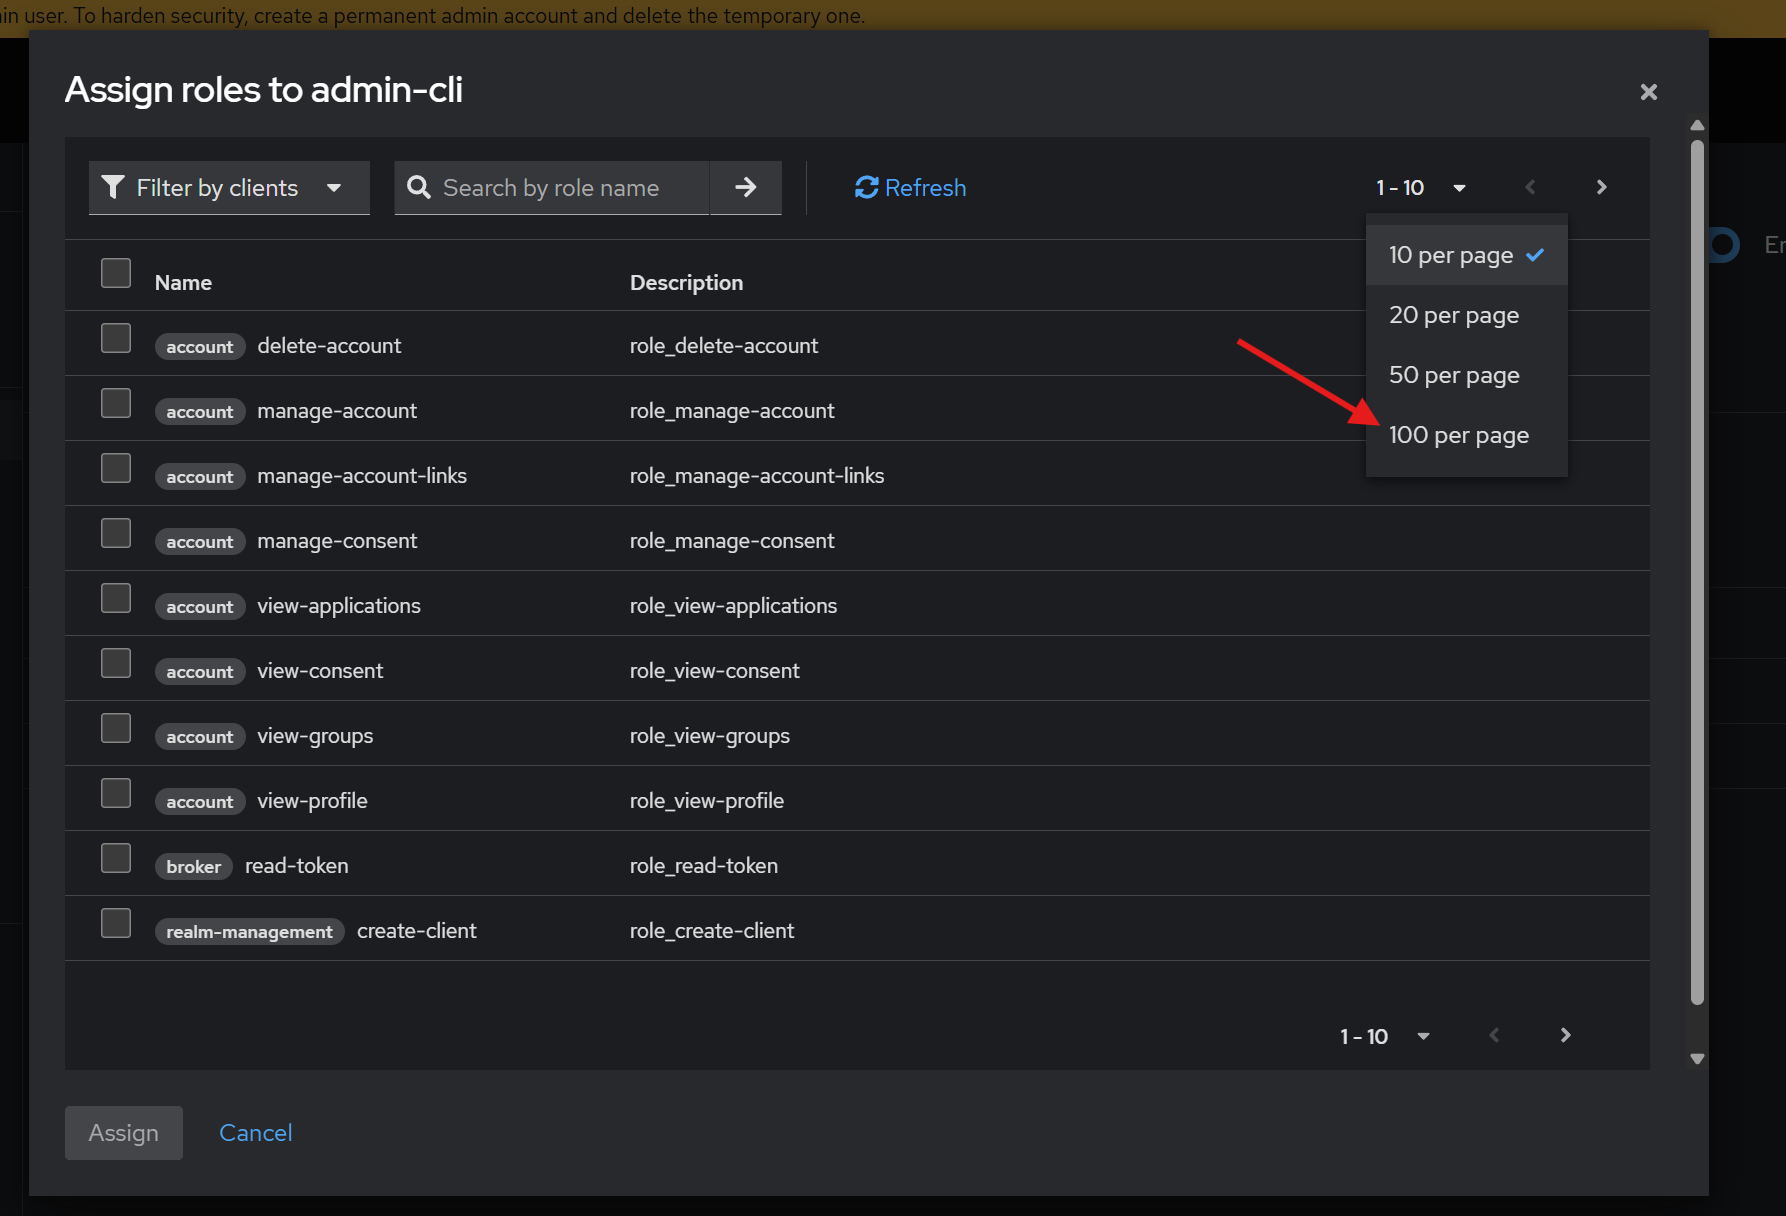
To simplify selection:
-
Change the page size to show 100 roles per page:
-
Select all roles by clicking the checkbox in the table header:

-
-
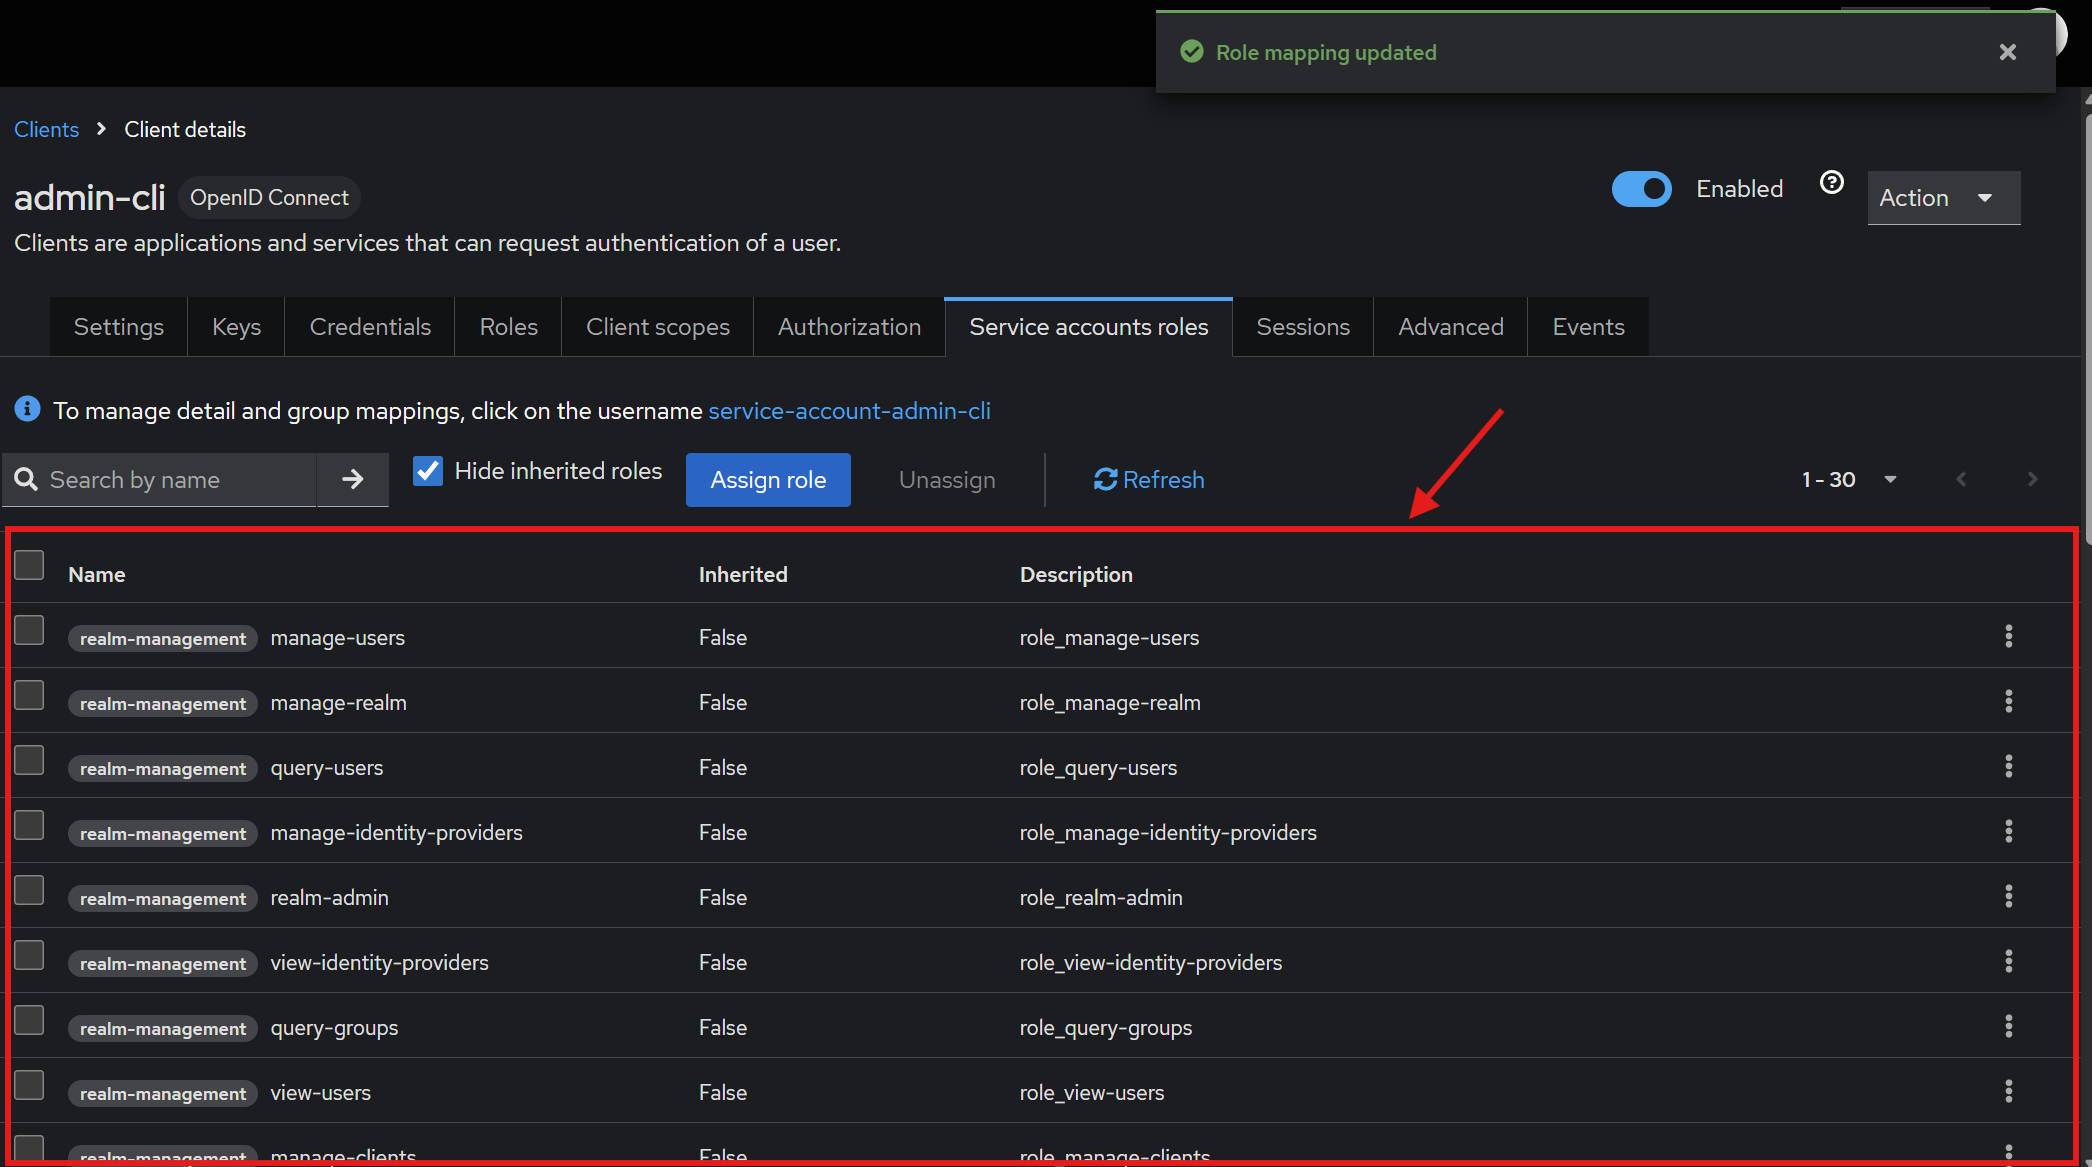
After selecting all roles, click Assign. You should now see all roles listed as assigned:
Set Custom Redirect URI (Optional)
If you are not using the provided P4H4 application and plan to integrate with the Keycloak service directly, you must configure your own redirect URIs.
To do this:
- Navigate to the Clients tab in Keycloak.
- Select the
appclient ID.
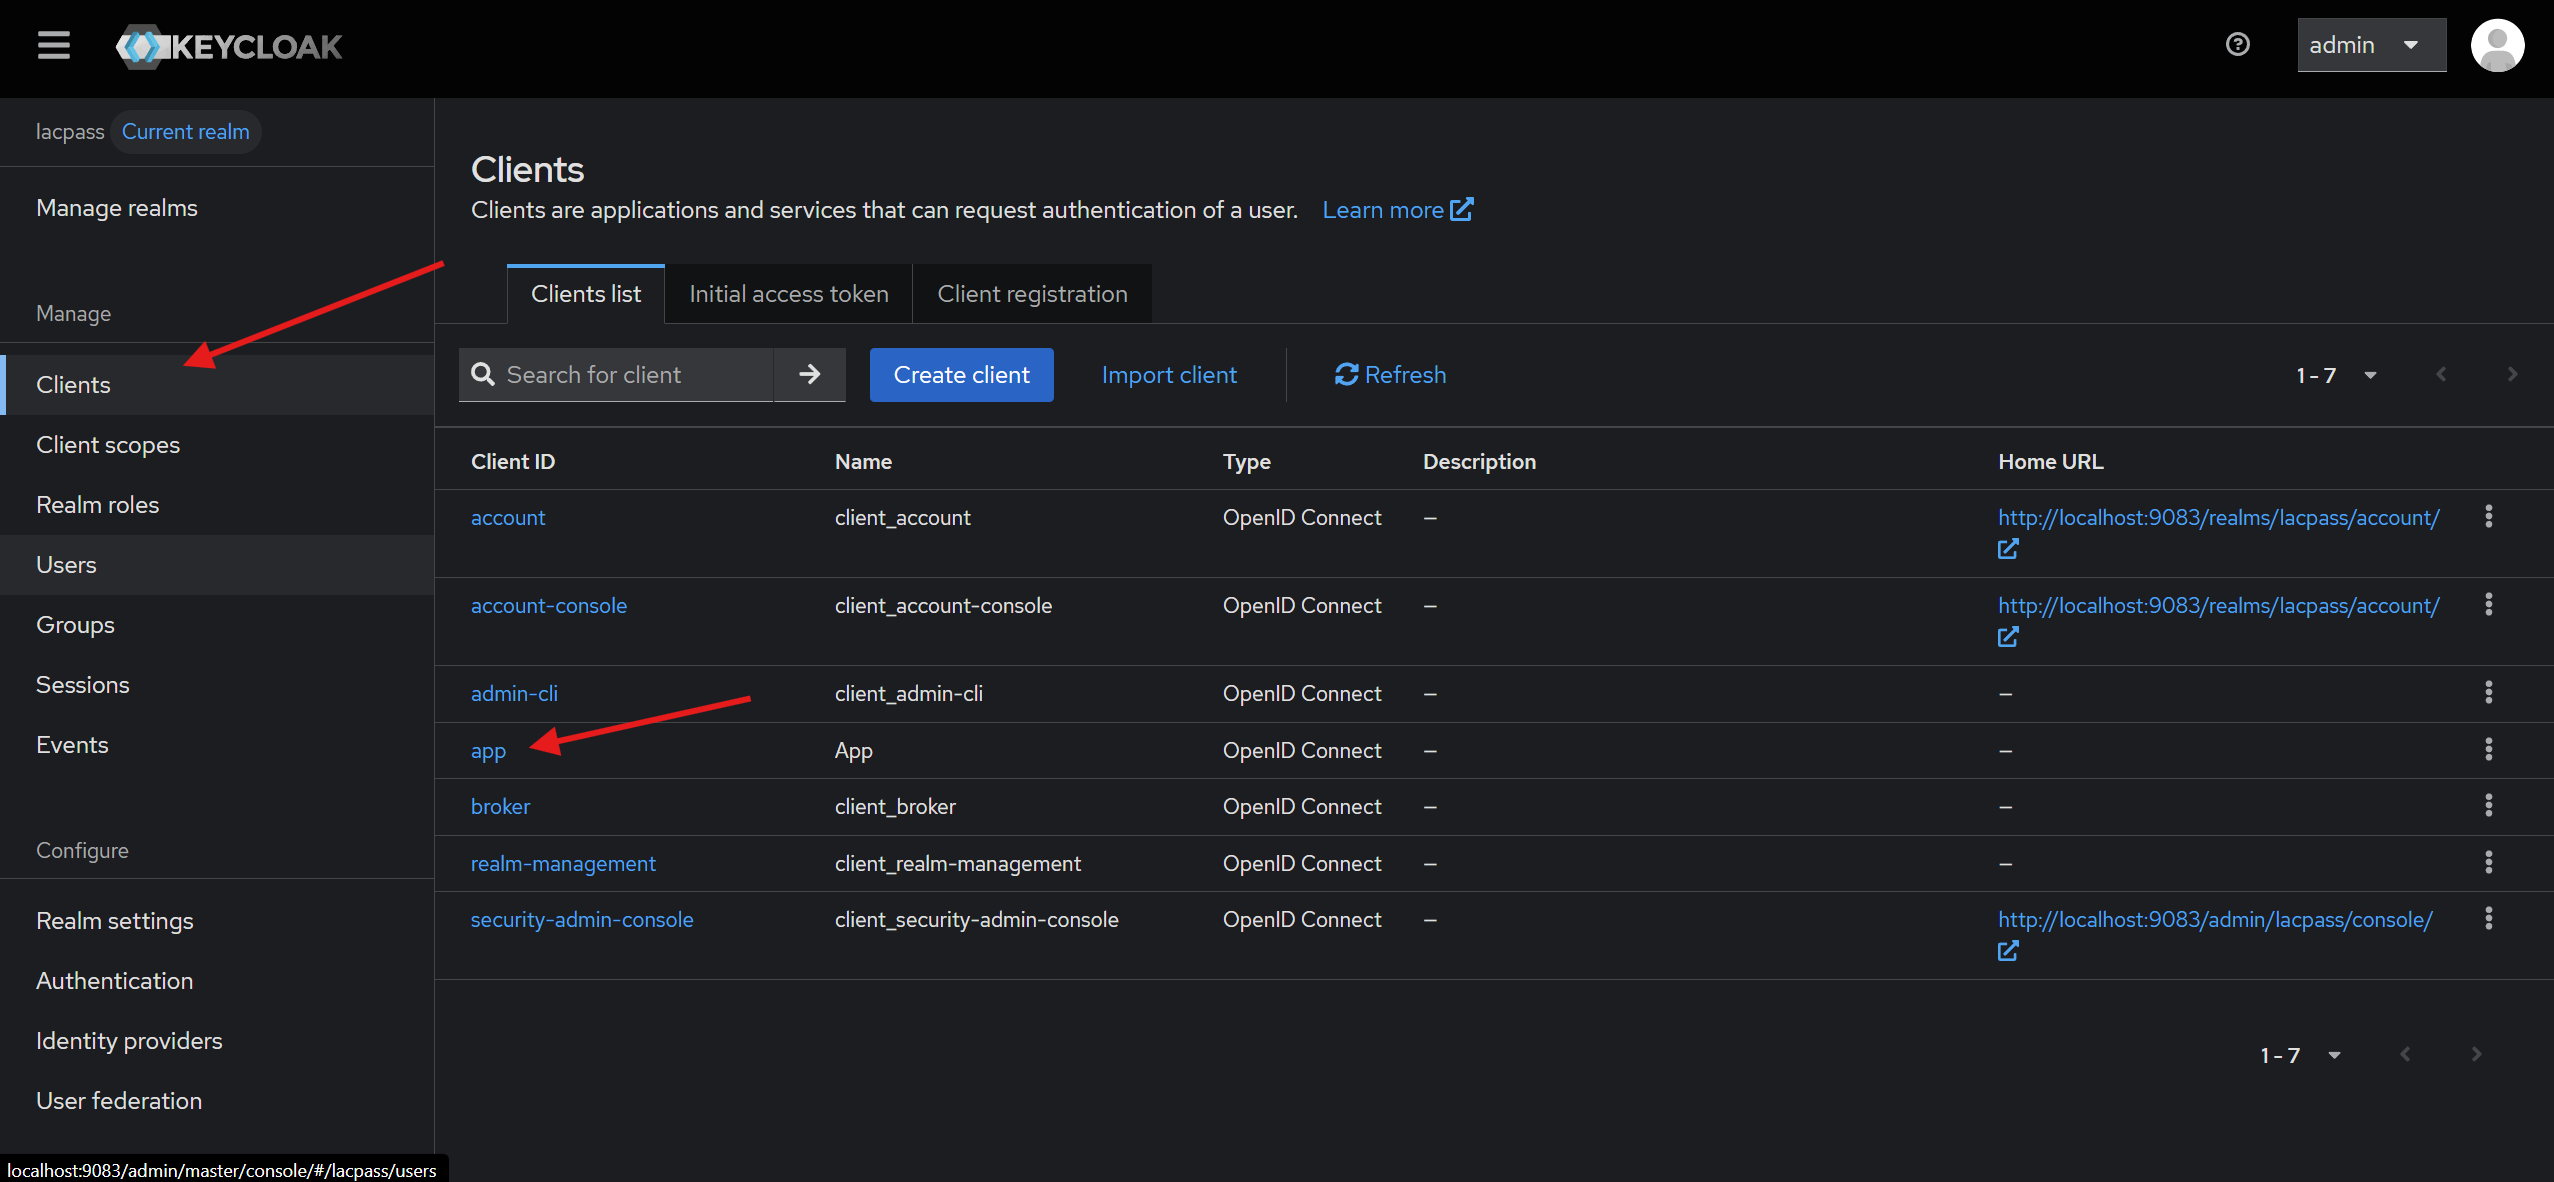
- Go to the Access Settings section.
- Under Valid Redirect URIs, add your desired redirect URI.
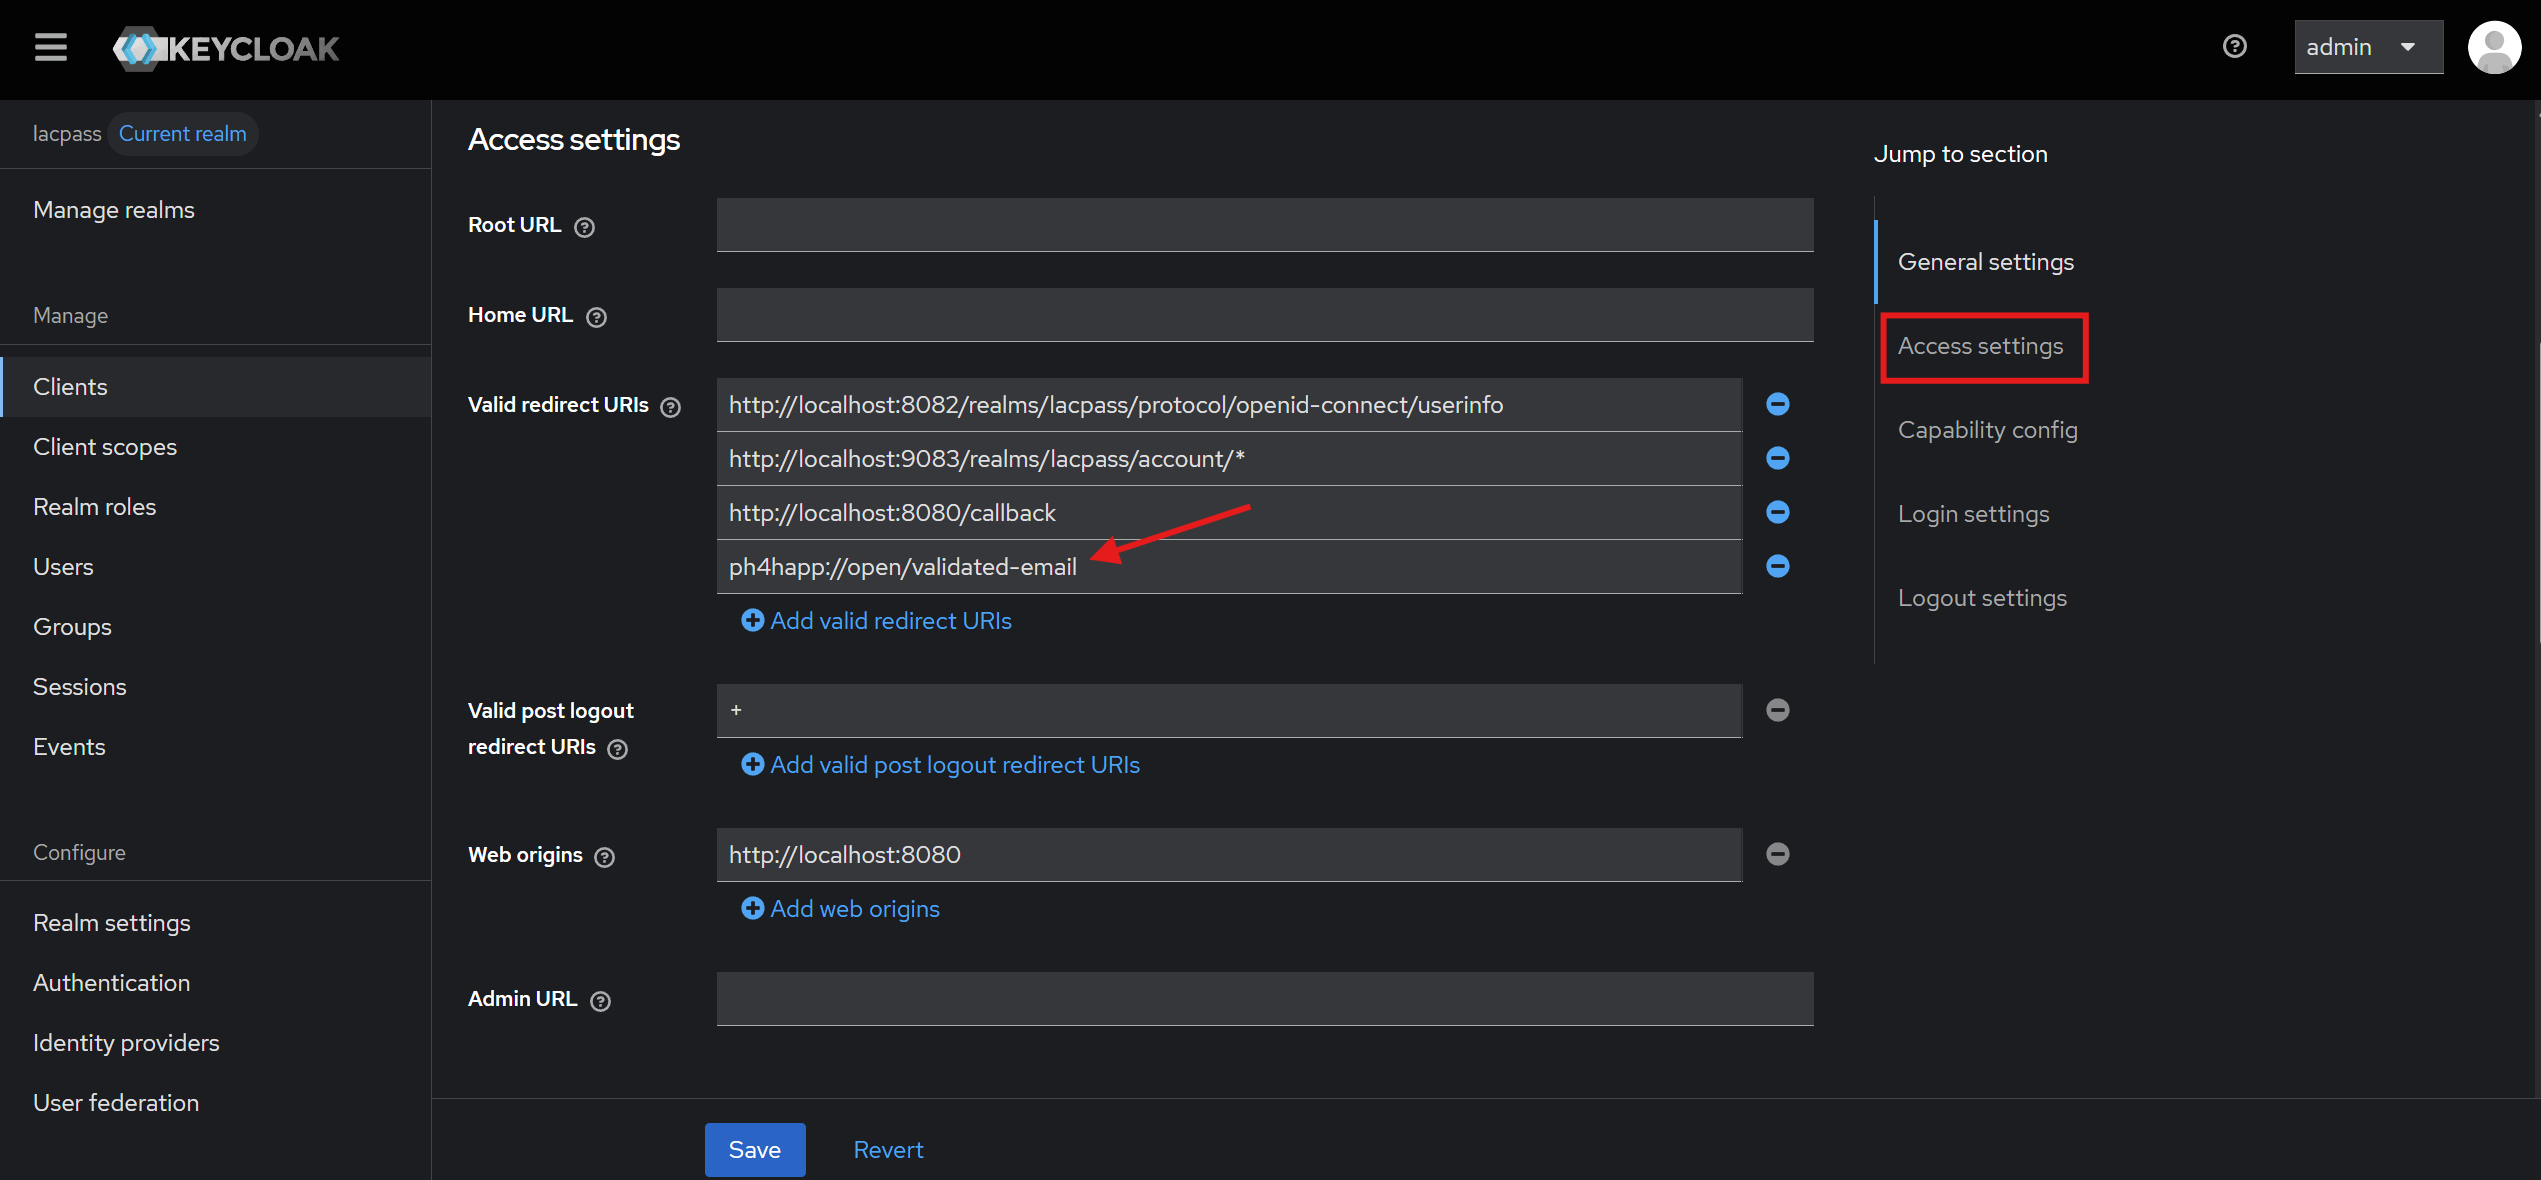
- Click Save to apply your changes.
This ensures your application can successfully handle authentication responses from Keycloak.
Set Frontend URL (for local development)
To test all Keycloak features in your local environment or when using IP addresses as domains, you need to configure the Frontend URL in your realm settings. You can do this by going to Realm Settings → General, as shown in the image below:
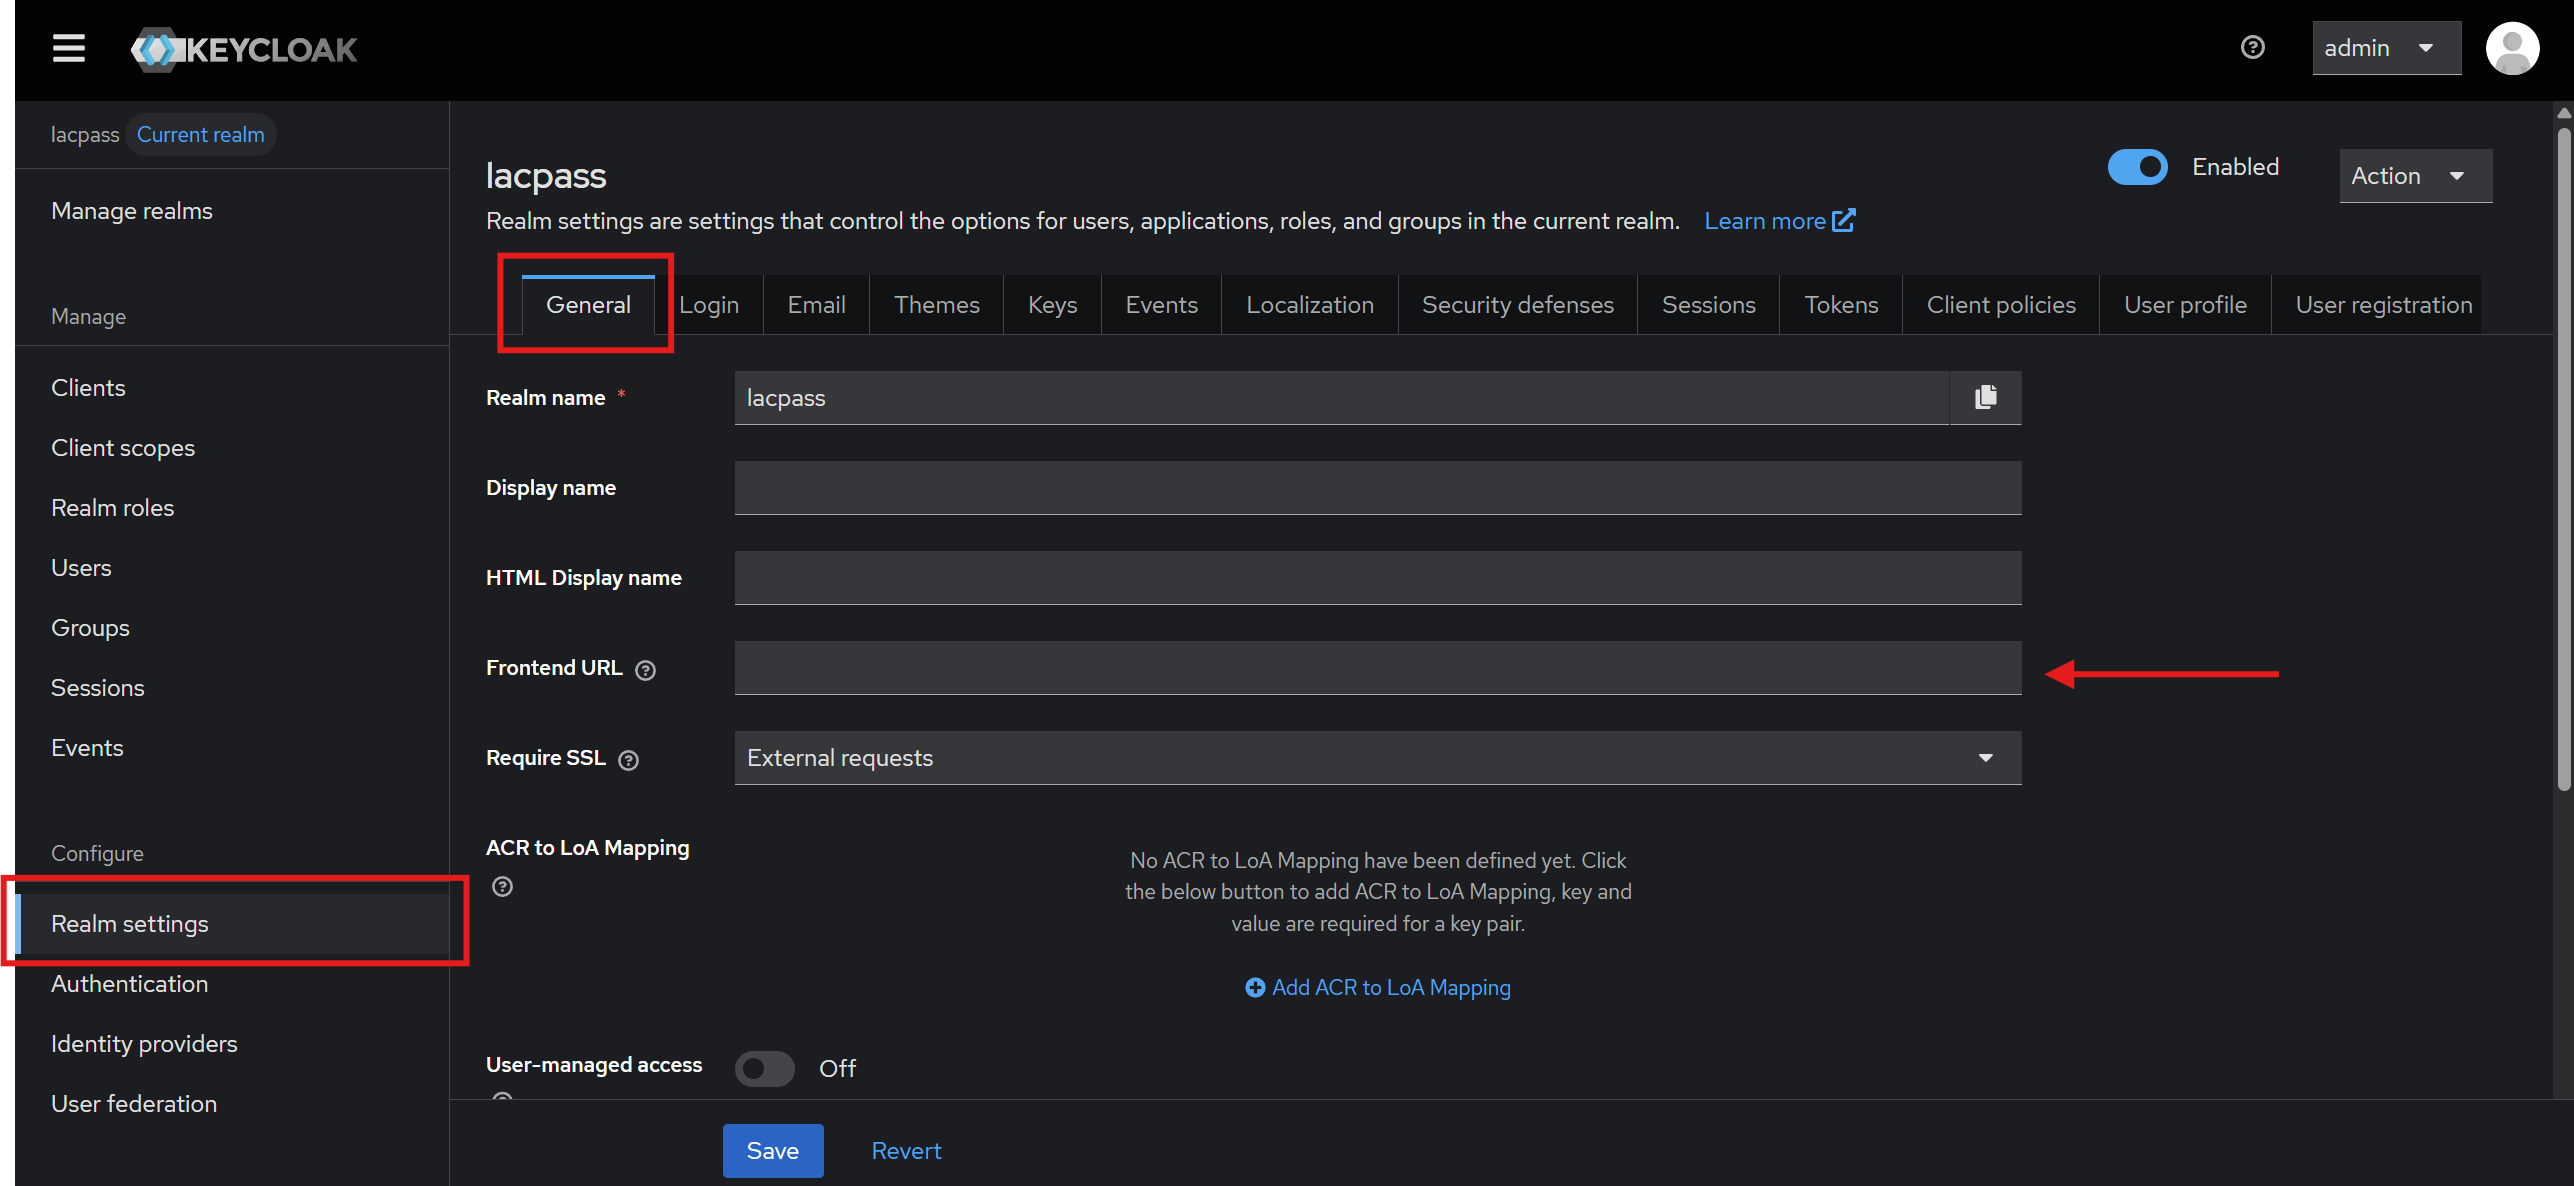
When working locally, do not use localhost. Instead, use 10.0.2.2.
This should point to the URL where Keycloak is running, so don’t forget to include the port.
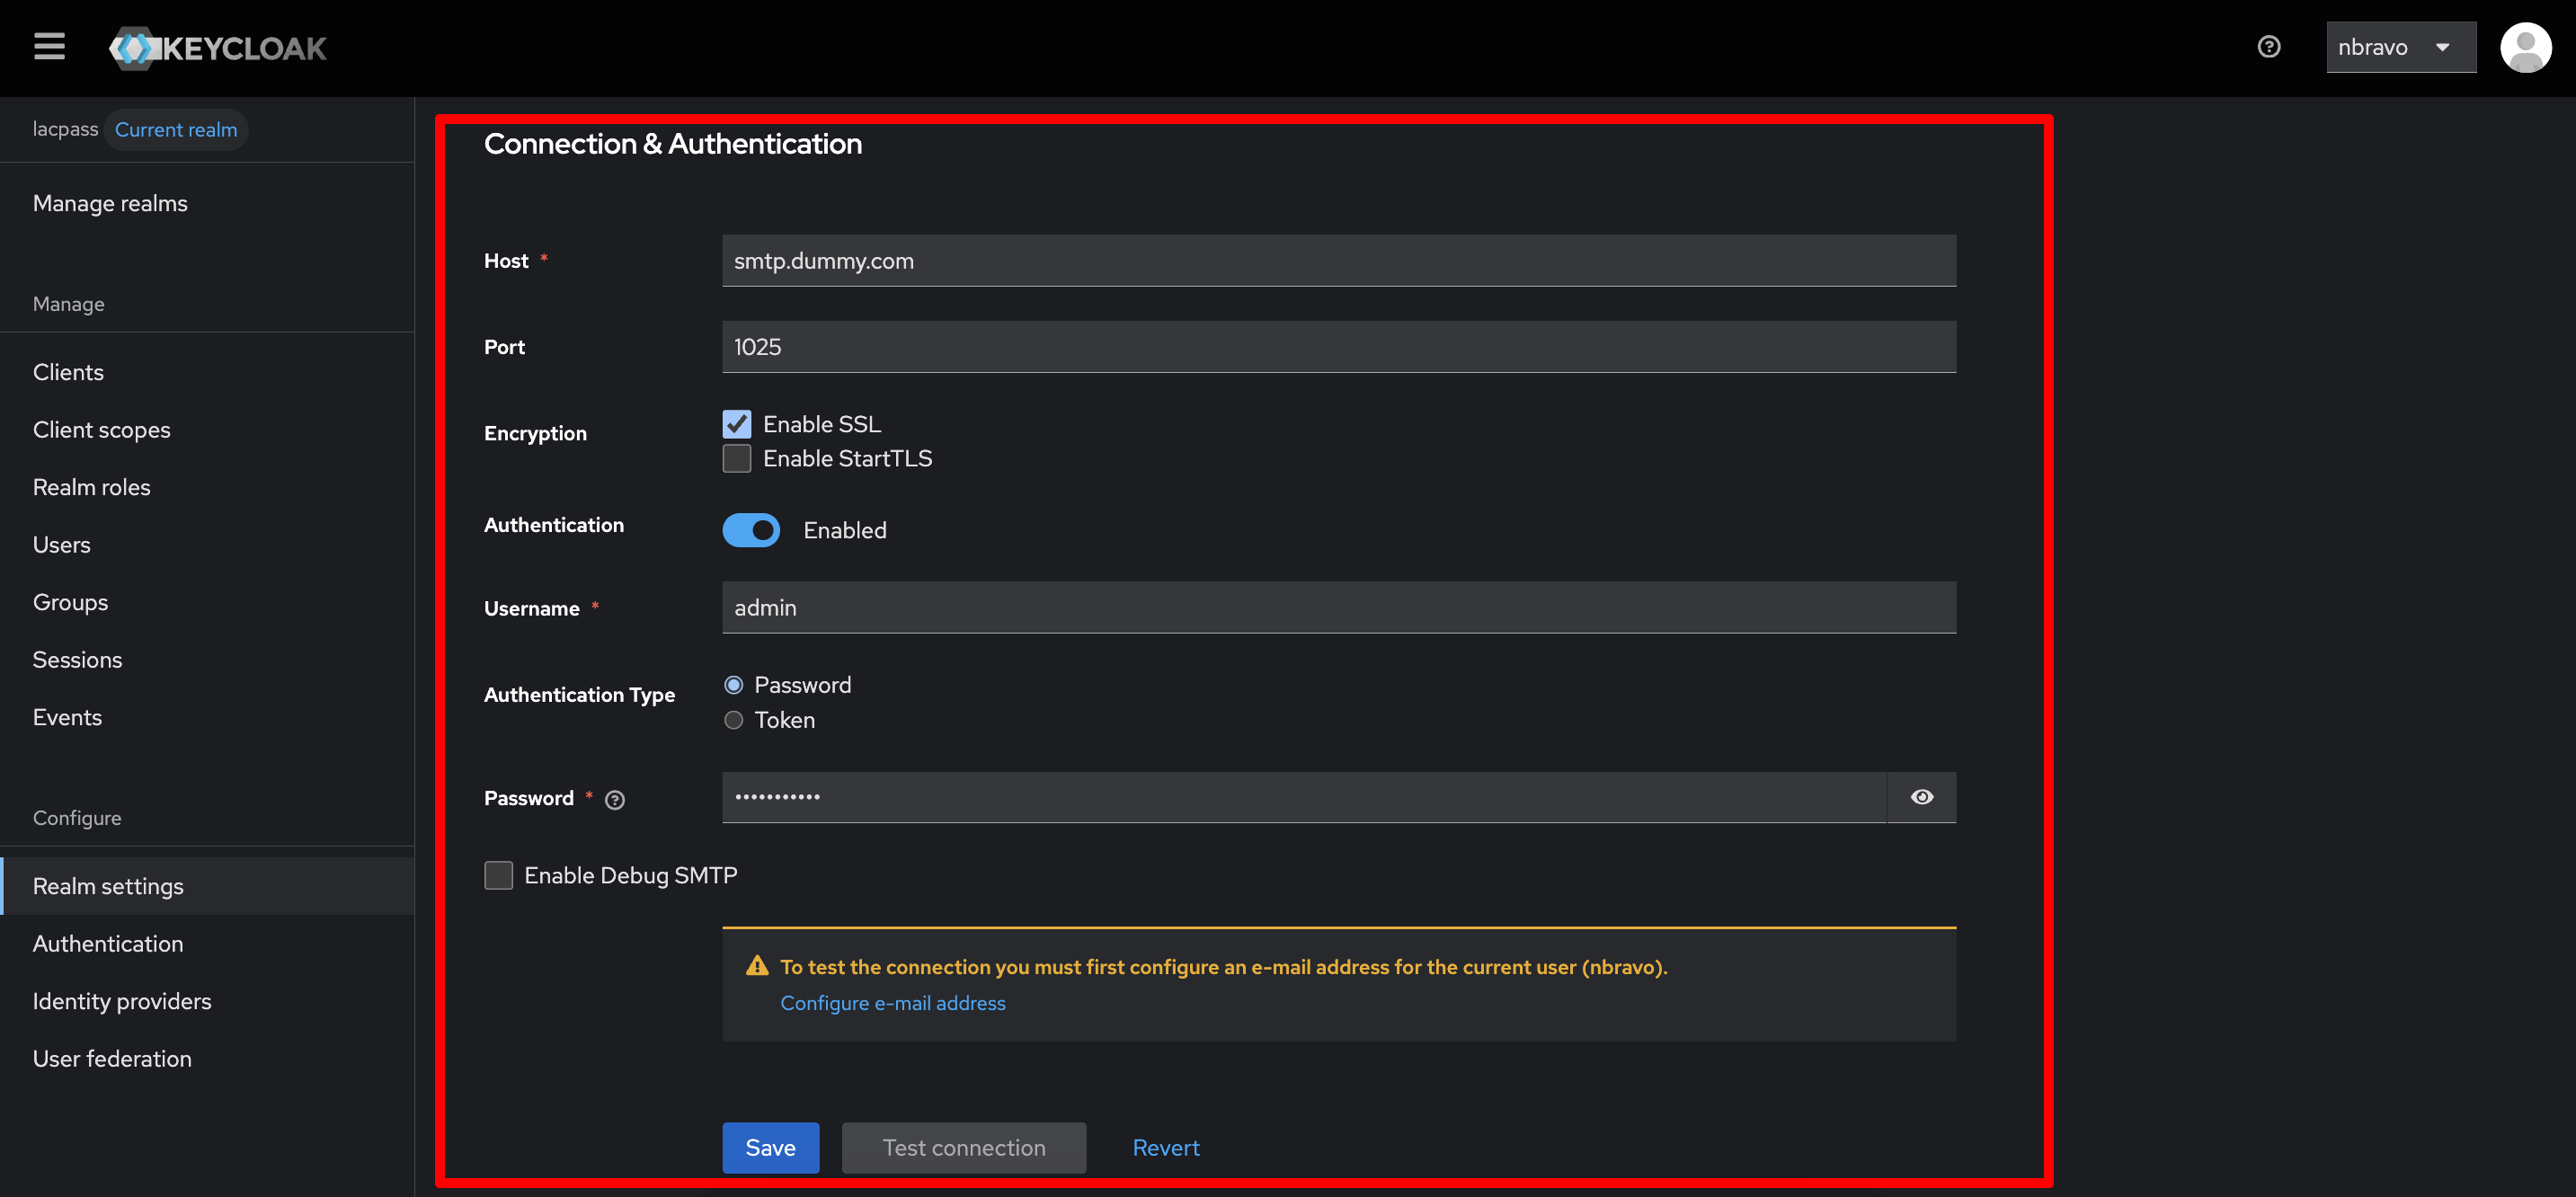
Set Authenticationl email
For recover password and similar services, a SMTP email account must be set to send emails to users. To do this:
- Ensure you are in lacpass realm.
- Go to Realm settings tab on the botton left.
- Go to Email tab.
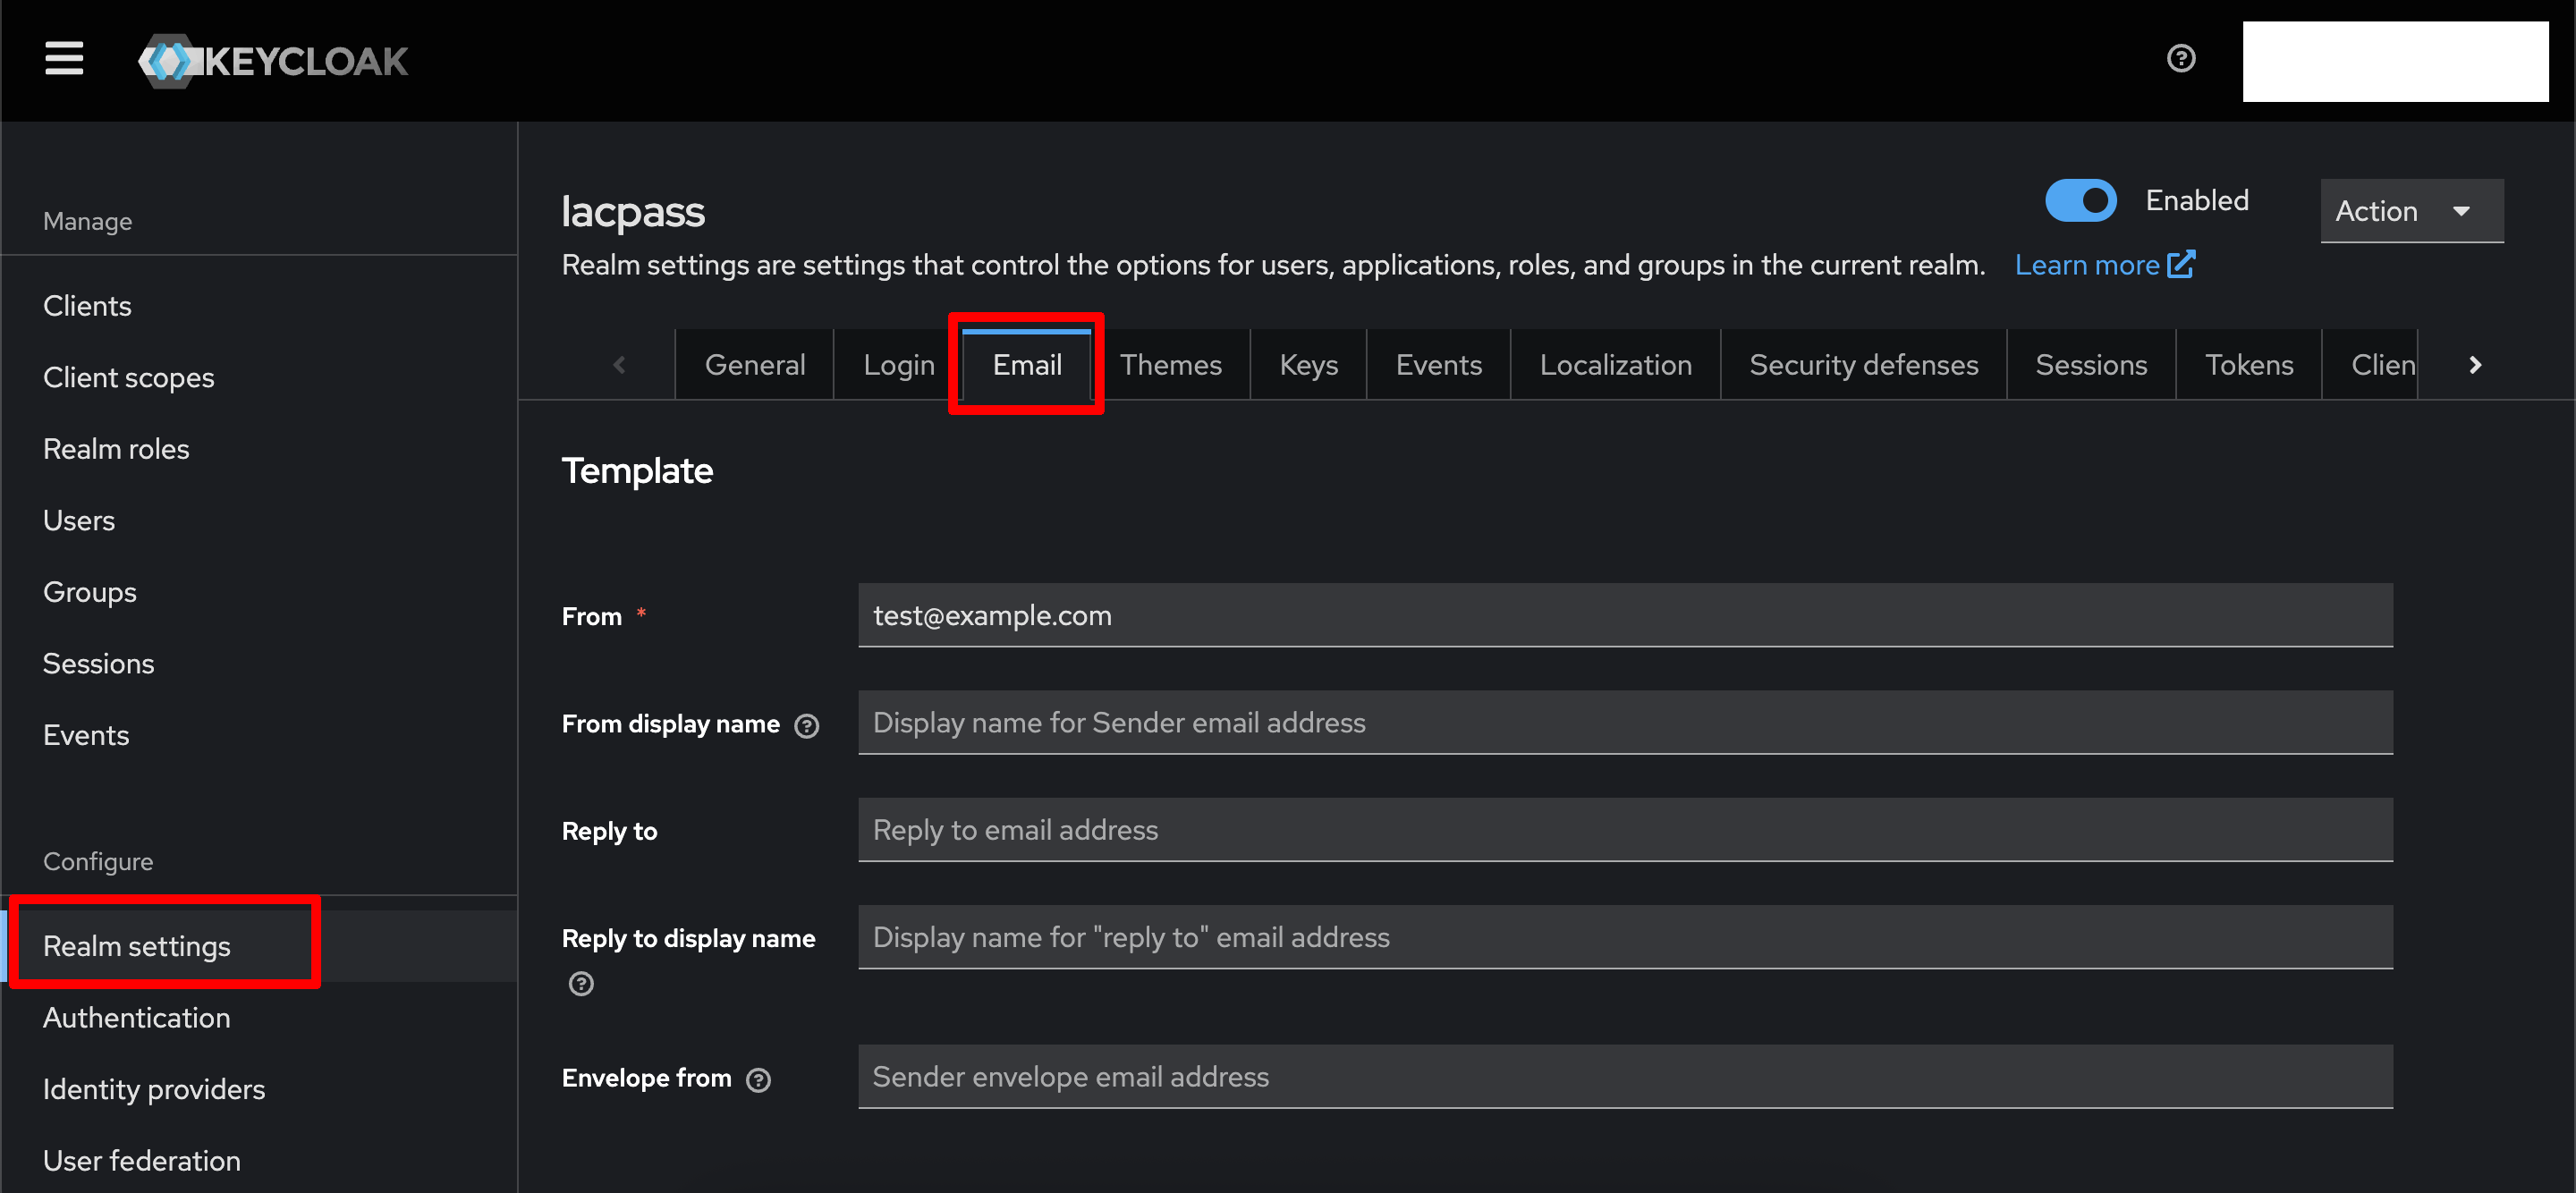
- On the bottom set your STMP credentials in the Connection & Authentication section and save.